Getting Started : Interface Overview

Interface Overview
To configure and manage the way Mail Markup Pro processes mail pieces, an interface (Fig. 4) is provided.
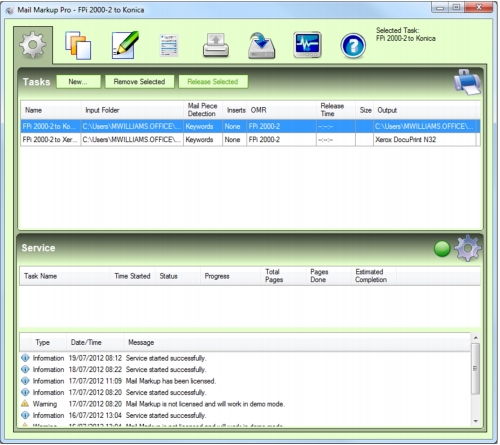
Fig. 4 Mail Markup Pro interface
The interface contains elements such as tabs, panels, and lists.
Launching (Running)
The Mail Markup Pro interface is launched (run) in one of the following ways:
NOTE:
To start and stop the Mail Markup Pro service using functionality within the Mail Markup Pro interface, the interface must be launched as an administrator or by logging on to Windows as an administrator.
MORE:
For details about launching applications as an administrator, refer to your Windows documentation or Help.
Closing (Exiting)
The Mail Markup Pro interface is closed (exited) by clicking the Close button located near the right-hand edge of the title bar.
NOTE:
If changes have been made to the currently selected Task, a Save Changes dialog (Fig. 16) appears prompting you to save the Task. Click the OK button to save or the Cancel button to abandon.
Tabs
Options and facilities to configure, monitor, licence and view information about Mail Markup Pro are contained in tabs (Fig. 5).
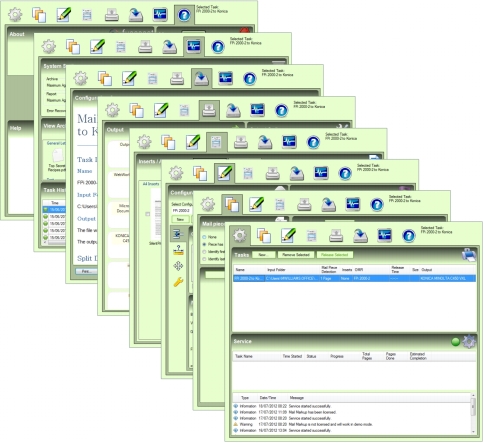
Fig. 5 Tabs
MORE:
For details about the sub-tabs found on the OMR Marks tab, refer to Managing OMR Configurations.
MORE:
For details about the sub-tabs found on the Digital Inserts tab, refer to Digital Inserts > Viewing.
MORE:
For details about the sub-tabs found on the System Status tab, refer to Post Processing >Archive > Viewing.
Opening
A tab can be opened in one of the following ways:
In the Tasks list double-click a field in the column associated with the tab. This is only applicable to the Mail Piece Detection tab (Fig. 22), OMR Marks tab (Fig. 30), Digital Inserts tab (Fig. 29) and Outputs tab (Fig. 31).
*The following tab buttons open the following tabs:
NOTE:
For certain tabs that contain Task configuration information, a Task must be selected before associated tab buttons become active (clickable).
Panels
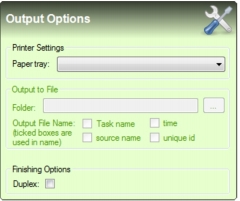
Many tabs contain one or more panels (Fig. 6).
Fig. 6 Panel
Panels organise certain information contained in a tab into related content.
Resizing
Certain panels will contain information that extends beyond its vertical limit. When this occurs the height of the panel will need to be resized in order to reveal the hidden content.
To resize the height of a panel, perform the following actions:
1.
2.
3.
4.
*NOTE:
If the cursor does not change to a double-headed arrow the panel cannot be resized.
Lists
The Mail Markup Pro interface contains lists (Fig. 7) that are used for clearly displaying and easily locating associated information:

Fig. 7 List (Tasks)
Sorting
Lists can be sorted by column in either ascending or descending order.
The column the list is currently sorted by is indicated by an arrow near the right-hand edge of the column heading. A down arrow indicates descending order and an up arrow indicates ascending order.
Click a column heading to sort the list by that column. Subsequent clicks of the column toggle between ascending and descending order.
EXAMPLE:
If a column was sorted in descending order and the column heading was clicked, it would be sorted in ascending order.
Resizing a Column
The width of list columns can be resized to display more or less information.
To resize the width of a column, perform the following actions:
1.
2.
3.
4.
Warnings
If there is a problem with information contained in a list field, a warning icon (Fig. 8) is displayed to the right of that information.
EXAMPLE:
If a newly specified Task name matches another Task name, the warning icon appears.
Fig. 8 Warning icon
Move the mouse cursor over the warning icon to display a tooltip describing the problem.
Context Menus
Context menus (Fig. 9) appear alongside the mouse pointer when certain components of the Mail Markup Pro interface are right-clicked.
Fig. 9 Context menu
Each context menu contains options applicable to the clicked component.
EXAMPLE:
Right-clicking a Task in the Tasks list (Fig. 7) displays a context menu containing options for releasing, removing and duplicating the Task.
Move the mouse pointer over a context menu option then click to select it.
Edit Boxes
The Mail Markup Pro interface contains edit boxes (Fig. 10) where text-based information can be specified.

Fig. 10 Edit box
Click inside an edit box then perform one of the following actions:
MORE:
For further details about adding, editing and deleting text in an edit box, refer to your Windows documentation or Help.
List Boxes
The Mail Markup Pro interface contains list boxes (Fig. 11) with selectable pre-defined options.
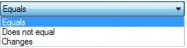
Fig. 11 List box
To use a list box, perform the following actions:
1.
2.
Check Boxes
The Mail Markup Pro interface contains check boxes (Fig. 12) that allow settings and options to be selected (by adding a tick) or unselected (by removing a tick).
Fig. 12 Check boxes
Click a check box to add and remove its tick.
Radio Buttons
The Mail Markup Pro interface contains radio buttons (Fig. 13) that allow single choice settings and options to be selected (by adding a dot) or unselected (by removing a dot).
Fig. 13 Radio buttons
Click a radio button to add a dot (select it).
NOTE:
Adding a dot to a radio button removes the dot from another radio button in the same radio button group.
Scroll Bars
When the information contained in a panel or list exceeds it boundaries, vertical and/or horizontal scroll bars (Fig. 14) appear. These provide a mechanism for moving the content of the panel or list up and down or left and right to reveal hidden content.

Fig. 14 Scroll bar (horizontal)
Click an arrow at the end a scroll bar to move the content of a list or panel in that direction.
MORE:
For further details about using scroll bars, refer to your Windows documentation or Help.
File System Navigation
There are a number of processes in the Mail Markup Pro interface such as specifying a folder or finding a file that require the Windows file system to be navigated. Navigation is performed in a Browse dialog (Fig. 15).
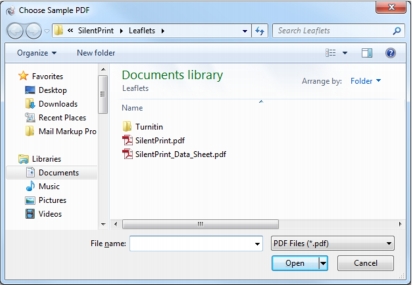
Fig. 15 Browse dialog (Windows 7)
MORE:
For details about how to use the controls in the Browse dialog, refer to your Windows documentation or Help.
Saving Changes
Certain actions, such as selecting a Task when the currently selected Task has had changes made to it, cause a Save Changes dialog (Fig. 16) to appear.
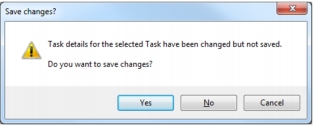
Fig. 16 Save Changes dialog
Click the Yes button to save the changes then continue with the action.
Click the No button to not save the changes then continue with the action
Click the Cancel button to retain the changes but not continue with the action.
NOTE:
Clicking any button also closes the Save Changes dialog.
Confirming an Action
Actions that require confirmation, such as exporting an OMR configuration when an OMR configuration file with the same name already exists, cause a Confirm Action dialog (Fig. 17) to be opened.
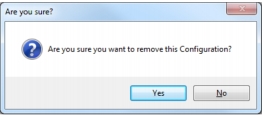
Fig. 17 Confirm Action dialog
Click the Yes button to confirm the action or the No button to abandon.
NOTE:
Clicking either button also closes the Confirm Action dialog.
Notification
Following the completion or failure of an action such as saving a Task, a Notification dialog (Fig. 18) normally appears.
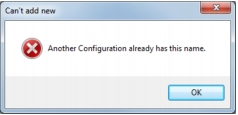
Fig. 18 Notification dialog
Click the OK button to close the Notification dialog.