Mail Piece Detection : Detecting by First Page or Last Page

Detecting by First Page or Last Page
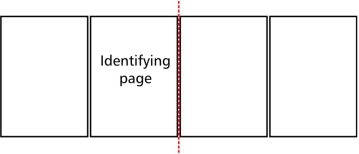
If the first page or last page of mail pieces in a PDF document can be used for detection, options to identify the first page or last page are available.
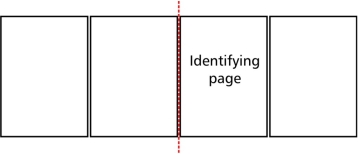
Fig. 26 Example first page identification
Fig. 27 Example last page identification
To identify the first page or last page of a mail piece, perform the following actions:
1.
Select the Identify First Page or Identify Last Page option.
2.
Managing Identification Rules
Rules for identifying the first page or last page of a mail piece in a PDF document can be selected, added, edited and deleted in the Identify First/Last Page panel.
Selecting
First page and last page identification rules are labelled with a number.
To select a rule, perform the following actions:
1.
Select the Identify First Page or Identify Last Page option.
2.
In the Identify First/Last Page panel click the Move Next and Move Previous buttons until the required identification rule number appears.
Adding
To add an identification rule, perform the following actions:
1.
Select the Identify First Page or Identify Last Page option.
2.
In the Identify First/Last Page panel click the Add New Rule button (+).
3.
A new rule is assigned a sequential number, with the first rule added being 1.
Editing
To edit an identification rule, perform the following actions:
1.
Select the identification rule.
2.
Deleting
To delete an identification rule, perform the following actions:
1.
Select the identification rule.
2.
In the Identify First/Last Page panel click the Delete button (X).
CAUTION:
Identification rules are immediately deleted and no confirmation is presented.
After deleting an identification rule, identification rule numbers and associated boundaries are renumbered.
EXAMPLE:
If identification rule 1 is deleted, identification rule 2 and its associated boundary become 1.
Undoing Changes
To undo adding an identification rule or modifying an identification rule option, click the Undo Rule Changes button.
Identification Rule Options
Each identification rule consists of three components:
A boundary on a mail piece page
The identification rule options should be considered as follows:
If a specified text string equals or does not equal the text within a boundary defined on a page, or the text within the boundary changes from that of the specified text string, the identification rule is satisfied.
Drawing a Boundary
To determine where Mail Markup Pro should look for a text string, a boundary must be drawn on the corresponding page of the sample file.
To draw a boundary, perform the following actions:
1.
Open a sample file.
2.
Navigate to the required sample file page and if necessary magnify the area where the boundary will be drawn.
3.
Select or add an identification rule.
4.
5.
6.
7.
8.
Fig. 28 Example of text encompassed by a boundary
A number that corresponds to the identification rule number appears to the right of the boundary.
EXAMPLE:
If the identification rule being configured is rule 1, then 1 appears beside the boundary.
While a boundary is being drawn, its coordinates, width and height appear in the Trigger When Text At box in the following format:
x, y, width, height
Specifying a Qualifier
The following identification rule qualifiers are available:
To select a qualifier, perform the following actions:
1.
Select or add an identification rule.
2.
3.
Specifying a Text String
To specify the text string that Mail Markup Pro should look for within the boundary, perform the following actions:
1.
Select or add an identification rule.
2.
3.
NOTE:
Text is case sensitive.
Specifying a Match
The first page or last page can be identified when all identification rules match or any identification rule matches.

To specify a match, perform the following actions:
1.
Select or add an identification rule.
2.